For a list of minimum hardware requirements of Red Hat Enterprise Linux 6, see the link: https://access.redhat.com/articles/rhel-limits
On this guide I use Graphical Installer.

3. Select Language.

4.Select storage device.

5. For new installation chose Yes, discard any data
6. Type computer name or host-name

7. Select time zone location.

8. Enter password for root user.

9. Select type of installation and review partitioning layout carefully also may choose Encrypt system.

10. Review partitioning layout, modify if needed. I have chosen Standard partition setup.

Some of the many new features that are included in Red Hat Enterprise Linux 6
- Power management – tickless kernel and improvements through the application stack to reduce wakeups, power consumption measurement by Powertop, Power Management (ASPM, ALPM), and adaptive system tuning by Tuned, all enhance more efficient system power usage.
- Next generation networking – comprehensive IPv6 support (NFS 4, CIFS, mobile support [RFC 3775], ISATAP support), FCoE, iSCSI, and a new and improved mac 802.11 wireless stack.
- Scalable filesystems – ext4 file system provides support for larger file sizes and significantly reduces repair times over ext3. XFS is a high-performance file system that supports extremely large files and is optimized for large data transfers.
- Virtualization – KVM includes performance improvements and new features, sVirt protects the guest and host from unauthorized access, SR-IOV and NPIV deliver high-performance virtual use of physical devices, and libvirt leverages kernel resource management functionality.
- Enterprise security enhancement – SELinux includes improved ease of use, application sandboxing, and significantly increased coverage of system services, while SSSD provides unified access to identity and authentication services as well as caching for off-line use.
- Development and runtime support – SystemTap improvements, ABRT is a new framework for simple collection and reporting of bug information, and improvements are made to GCC (version 4.4.3), glibc (version 2.11.1), and GDB (version 7.0.1).
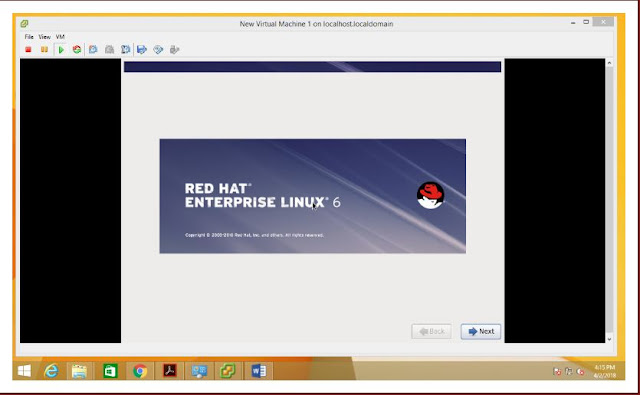
On this guide I use Graphical Installer.
1.Select Install or upgrade existing system options.

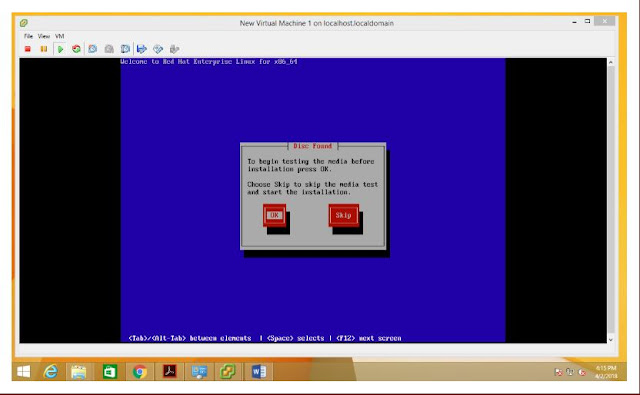
2.
Choose skip media test, click ok if you want to check media.


3. Select Language.

4.Select storage device.

5. For new installation chose Yes, discard any data

6. Type computer name or host-name

7. Select time zone location.

8. Enter password for root user.


This comment has been removed by the author.
ReplyDeleteBuy microsoft office 2016 home & student (1 MAC) (MAC Version) and Get Life Time License for Word, Excel, PowerPoint, and One Note. You can store files in the Cloud with OneDrive. OneNote notebooks help you easily organize your notes and find just what you need fast. Share notebooks to simplify group projects.
ReplyDelete